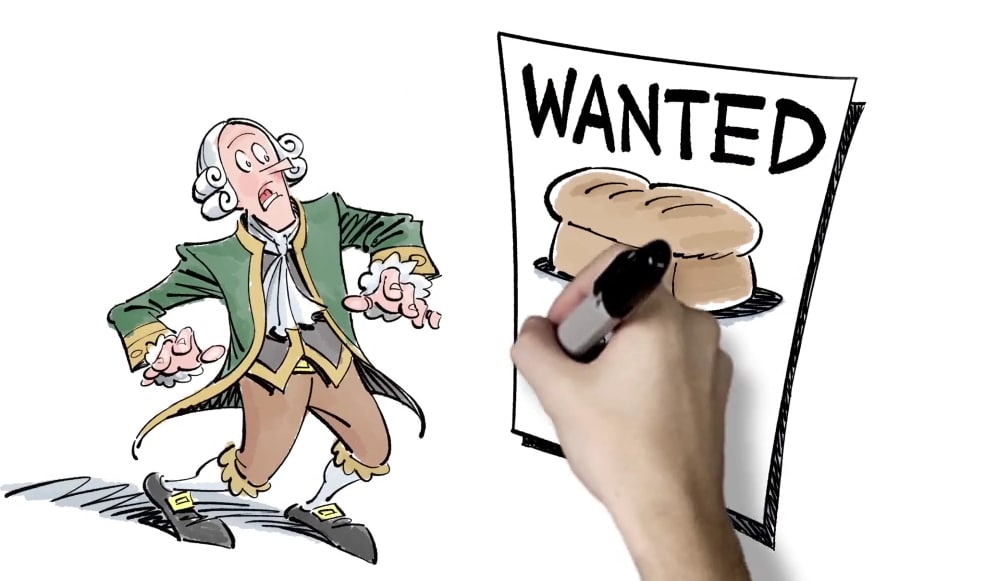
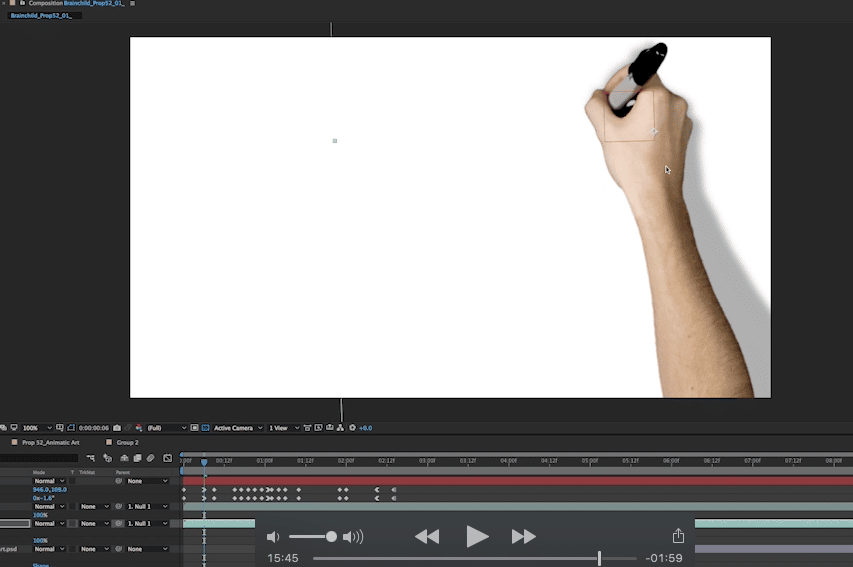
Whiteboard animation comes in all shapes and sizes, but there really is a difference between budget whiteboard animation effects and quality animation. The devil is in the details, and to demonstrate just a hint of the meticulous care that goes into smooth seamless whiteboard animation, we asked one of our top animators, Scott Strong to break down two fundamental whiteboard animation effects in Adobe After Effects.
In the video below Scott shows you:
- How to create a mask effect to “reveal” whiteboard animation in After Effects
- How to add and animate a hand to “draw” the revealed animation in After Effects
In the video, Scott walks you through the process step by step, including the tools he uses, how to sync up the keyframes for seamless animation, how to add a realistic drop shadow to your animated hand, and a few of his own personal tips and tricks to make the whole process as easy as possible. Scott really is an animation expert, and if you follow along you’ll have a great understanding of how to create professional level whiteboard animation using After Effects.
Whiteboard Animation In After Effects
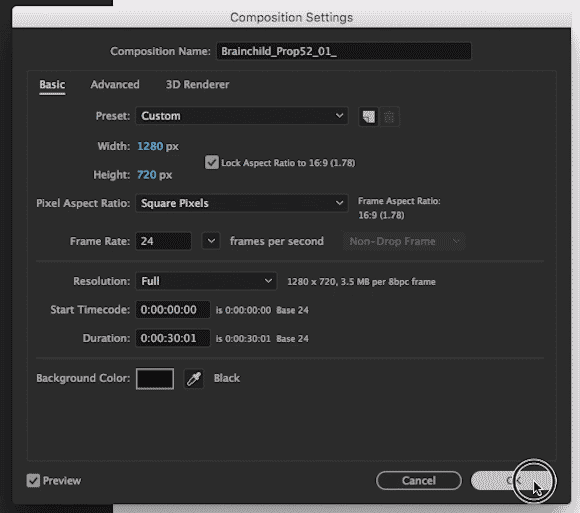
Scott starts this project with a simple look at layers. Scott sets a standard 16:9 aspect ratio and 24 fps of this project to 1280 x 720 px.
He uses three layers to keep things simple—a white background, an illustration layer, and a layer of text. You can add as many layers as you need for the project, and still use the same techniques from the video.
How To Create A Whiteboard Mask Reveal In After Effects
- Select the “Pen” tool
- Isolate the layer you want to mask
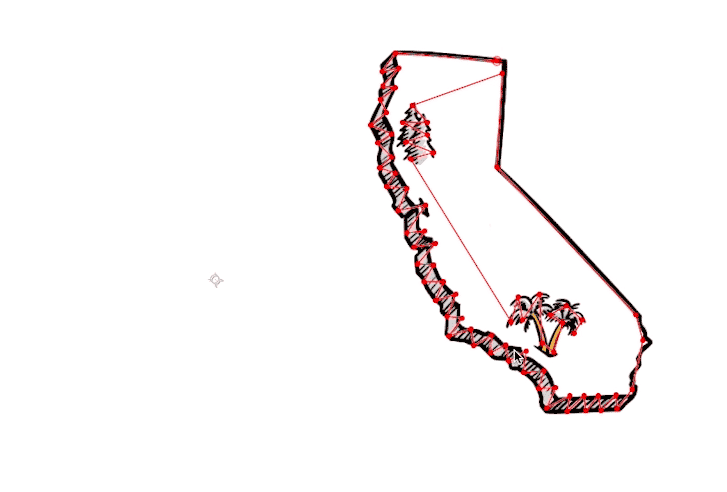
- Click on the start point of your mask and add anchor points around the shape in the order you want to reveal
- Change the color of the mask (for better visibility)
- Choose the “Effect” Menu
- Select “Generate”
- Choose “Stroke”
- Increase the brush size until the mask covers up the artwork
- Move any mask points to completely cover the image
- Click the “Stopwatch icon” in the “start” layer
- Hold “U” key to set the keyframes for this effect to the desired time (1 second in this video)
- Change the value of “Start” to 100%
How To Create A Mask For A Layer Of Text In After Effects
The process is almost identical to masking an image with a few differences. When you create an animated reveal of text you have to account for the way that people write, i.e. the hand will move from left to right, top to bottom. That means you have to set your initial mask anchor point at the top left of the first letter being animated.
- Select the “Pen” tool
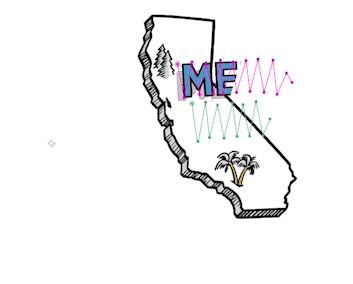
- Click on the start point of your mask and add anchor points around the word in the order you want to reveal them
- Create an individual mask for each line of text (in this example, Scott creates two masks)
- Change the color of the mask (for better visibility)
- Choose Effect > Generate > Stroke
- Increase the brush size until the mask covers up the artwork
- Move any mask points to completely cover the image
- In the “Stroke” menu click the box that says “All Masks” to apply the effect to both masks
To Mask Text Over an Image:
If you’re creating a mask on text over another image you have to take a few extra steps to create the reveal illusion.
- Choose Effect > Paint Style > Reveal Original Image
- Reduce the “End” value to 0%
- Set a keyframe for “End”
- Determine the timeframe of your animation (1 second in this example)
Whiteboard Animation In After Effects: Timing
The point of creating this reveal effect is to give the illusion that a hand is actually drawing this effect. To do that you have to smooth out the reveal and mask effects just a bit. A great way to achieve this is by delaying the animation effect on each layer by 4-6 frames. So in the example, Scott paces the initial animation on the first layer 6 frames after the video starts, and provides a 4 frame buffer before the second layer of text animation starts. Repeat as needed.
Pro Tip: Dragging your layers to the precise animation points streamlines your workflow and provides fewer frames for After Effects to calculate when you set your final render. Every time you apply an effect to a layer, you’re adding calculations. Keep your timeline tight and the render will be faster.
How To Add A Hand Effect To Whiteboard Animation In After Effects
It’s time to add the effect that practically defines whiteboard animation—the disembodied hand that “draws” the animation you just created. There are layers of complexity to this step in the animation process, and each one adds another bit of realism. Take your time and the end result will be seamless.
- Add the video of the hand to your timeline. Scott uses a sample from the RSA.
- Add a New Layer
- Select “Null Object”
- Place the Null where the “drawing” is actually happening, aka near the pen in the video sample
- Make the “Hand” layer a child of the “Null” layer
- Create Position on the Null layer
- Create Rotation on the Null layer
- Rotate the Hand 90°
- Drag the hand off screen
- Set the first keyframe at this off screen, rotated point
- Sync the animation with the first layer (6 frames in this example)
- Drag the Null back up into frame and rotate it to a natural angle
- Arc the path of entry for the hand to make it look natural. Remember that real life moves in Arcs, not straight lines
- Now, animate the hand — drag the hand layer to the animation points. Hold down Option+Command as you select the keyframe to use the angle tool as you work for better adjustments of the hand layer
- At the end of the image, rotate the hand 90° and drag it off screen. Make sure to arc the path off screen and add an ease out effect to the final 4 frames.
- End the animation with 4-6 frames of animation off screen
Whiteboard Animation in After Effects Pro Tips
- Set an “ease in” at the beginning of the keyframe
- Change the opacity on the Hand layer to 50% so you can better see the image it’s animating
- Rotate the hand as you animate to create a more natural “drawing” motion
- Select the last four keyframes (off screen animation) and “Hold” the animation to keep the image smooth
How to Create a Drop Shadow Layer in After Effects
How you create the shadow on your hand layer separates the quality whiteboard animation from the cheap stuff. It all depends how you establish the opacity, the distance from the object, and the rotation of a single off camera light source.
- Duplicate the Hand layer (Hide the original layer)
- Choose Effect > Perspective > Drop Shadow
- Click the “Shadow Only” box
- Reset the LAYER opacity to 100% (in the timeline)
- Change the EFFECT opacity of the drop shadow layer to 35%
- Increase the “Softness” to about 35
- Turn on the original Hand layer to check the Shadow layer against it
- Increase the distance to the desired length (44 in this example)
You can leave the drop shadow effect here, but it runs the risk of looking a little artificial. The shadow won’t change with the rotation of the hand, and it looks uniform to the surface of the whiteboard, instead of graded in accordance with what an actual hand and arm would like on a real whiteboard. Remember that the pen and the hand would be closer to the whiteboard than the forearm. If that realism matters, here’s how you fix the shadow effect.
How to Add a Realistic Shadow Layer in After Effects
- Select “Distort” in the Effect menu, and choose “Transform”
- Align the Transform effect anchor point and position to the original Null layer point
- Set the “Skew Axis” to 90°
- Push the Skew over until the shadow looks natural, or adjust the Drop Shadow effect distance
- Select the Copy of the Hand layer and click on Effects > Transform
- Hold Option and select Rotation
- Select the pic whip and slave it to the rotation of the Null layer
- Type “*-1+value” to the expression. This will negative out the rotation on the shadow layer and keep it centered on that single Null point
If you do all that, the end result will look like the hand is closer to the whiteboard than the arm. It’s a subtle difference, but that’s what high quality production means—a bunch of little details that add up to seamless, realistic animation.
How To Make Whiteboard Animation In After Effects
Attention to detail is the main difference between cookie cutter whiteboard animation, and top quality videos that set your brand apart. Take the time to make every layer of your animation the best it can be and you’ll see the results in the finished product—and so will your viewers.
